
Uses the pervasive database engine to connect to the data which resides on the server. Pervasive has transactional and relational components meaning file security and permissions for the users running System Five are very important.
as of the writing of this document, Windward supports 2 different versions of PervasiveSQL or what is now known as "Actian PSQL".
- Zen-EnterpriseServer
- Zen-EnterpriseServer v14
Whichever version you are running on, the installation steps will be the same.
Please ensure that there are no spaces in the directory names for Windward files.
Requirements: Administrator Permissions for the Server Windward Share and all its sub folders with full Read/Write. Contact your IT for permission requirements.
The default installation folders
We save all Windward installers at the server machine and inside DriveOfYourChoosing\Windward\Temp folder

We also share the entire Windward folder with full read/write permission to all users. This way it is accessible from the workstations via a mapped drive.
Server
PSQL installation
Navigate to the Temp folder where the installers are stored
Right-Click PSQL-Server or Zen-EnterpriseServer "whichever one you have" and run as an administrator to install

By default, the installer will extract the installation files to "C:\Users\YourUser\AppData\Local\Temp". You may click on the "Browse" button to select a different directory or keep it as is.
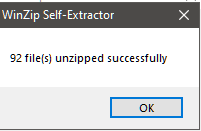
- Click on the "Unzip" button to continue
- Once done unzipping, click on the "OK" button to continue
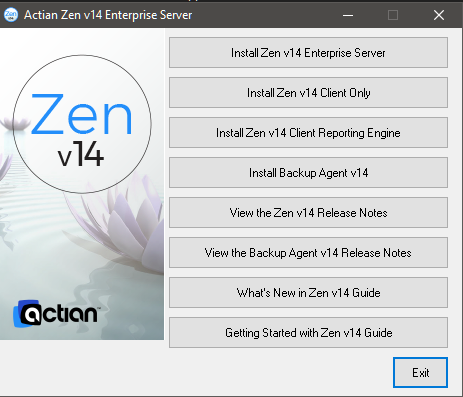
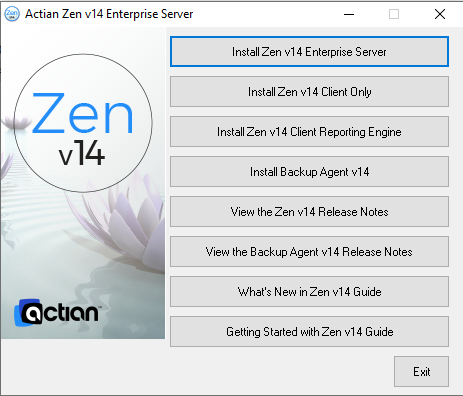
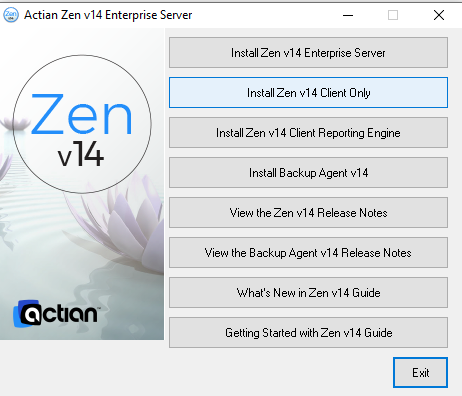
- This is an "all-in-one" installer so you should see more packages or options here. But we are only focusing on the first 2 options from the top as we have not tested the rest of them with our software.
- Click on the "Install Zen v14 Enterprise Server" button because we are installing it on the server machine.
- "Install Zen v14 Client only" is installed at the workstations. Which we will cover later on.
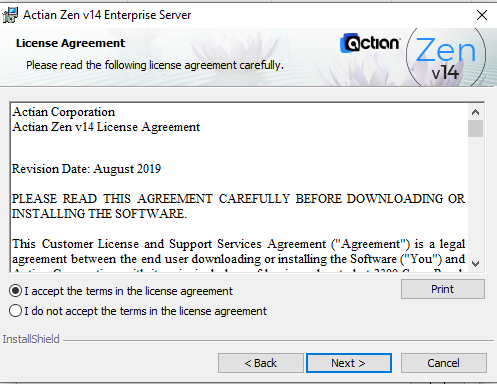
- Click on the "Next" button

- Select "Accept the terms in the license agreement" and click on "Next" to proceed
- Keep the setup type to Complete and click "Next"

- Now, click on the "Install" button and wait for it to finish

- Click "Finish". This should also, open the registry message on your browser. You can close that, we will register or apply the license key in the next steps.

- Now, you can click on the "Exit" button from the package installer window.
Apply the PSQL License Key
We don't normally store or save a copy of the license key on any of your computers. But we can provide it given that there is consent from the Company Owner. So, this process is usually done by the Windward Technician but if you do have the key you can apply it through the steps provided in the article below.
The article states that it is for a User Increase, but the same steps apply to applying the permanent PSQL key.
SystemFive install
- Go back to the Temp folder and look for the "SystemFiveSetup.exe" and run it as an administrator.
- Older System Five installers are called "S5Install.exe"
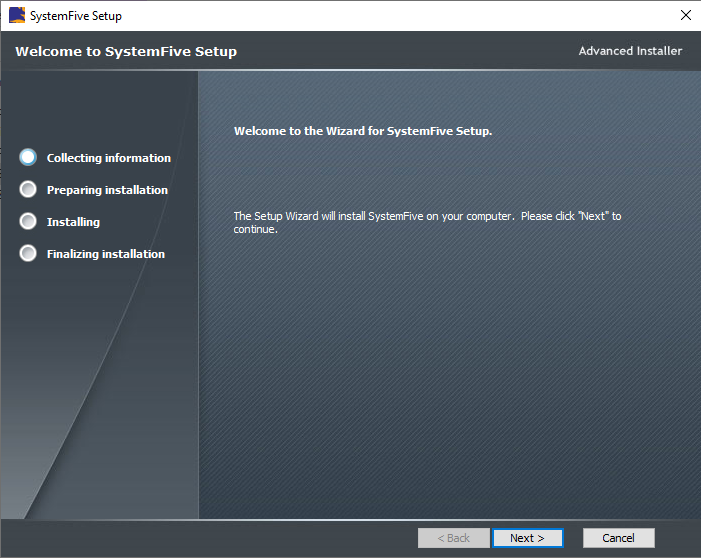
- The first prompt is going to check for system requirement, Click "Next" when ready
- You will be prompted to create both LIVE and TRAINING installations. You can leave both checked or uncheck training if not needed and click "NEXT".

- By default, the installer will point to C:\Windward\System5 folder. if this is not the case, click on the "browse" button and nagivate to DriveOfYourChoosing\Windward\System5 folder and click on "NEXT" to proceed.

- Click on the "INSTALL" button to begin the installation.

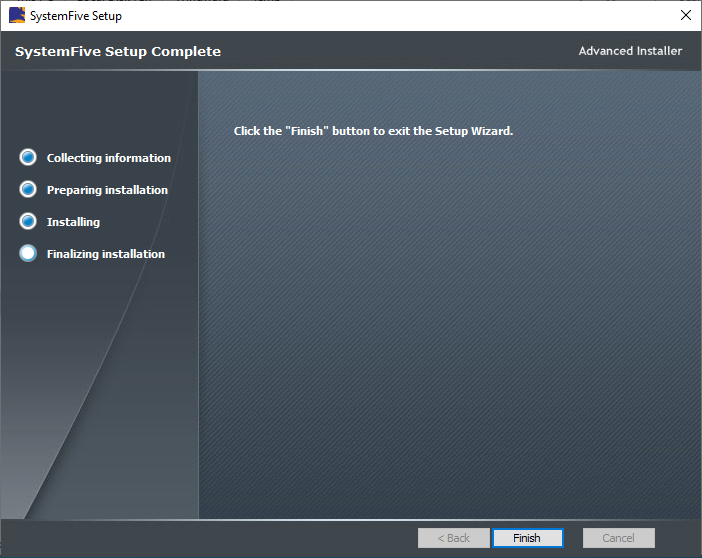
- Now, click on the "FINISH" button to complete. This will also create a shortcut icon on your desktop
Create a Dataset
This part of the process can only be done by a Windward Technician. Because of the data template that we have available for various market retail type, we use specific ones with basic settings already in place to speed the implementation process. You can ask assistance from Support on this.
But if you already have an existing Data, just make sure you have it inside a shared folder, no spaces and with full permission to everyone. In stardardized practice, Windward Support will put it inside DriveOfYourChoosing\Windward\System5 at the server.
Link to the Dataset
After the PSQL and SystemFive installation, there is a need for us to point the software where the dataset is residing. In most cases, the path will not be written into the Windows Registry due to restrictions. And because of this, we will have to set the permission to this entry with Full Read/Write permissions to everyone first.
- Run or search "regedit" via windows, this will open the Windows Registry Editor
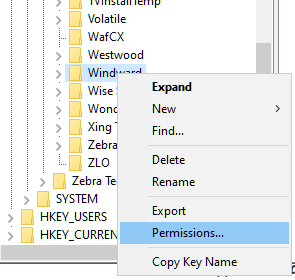
- Navigate to Computer\HKEY_LOCAL_MACHINE\SOFTWARE\WOW6432Node\Windward
- Right-click on "Windward" and select "Permissions"
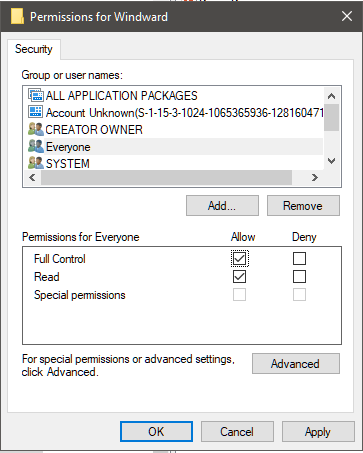
- Click on the "ADD" button

- Under the box for "Enter the object names to select", type in the word "Everyone" and click OK button

- You should be back to the previous screen. Select Everyone and check "Allow" for Full Control. Click APPLY and OK to save
You can close the registry window now.
- Now Run the System Five shortcut on your desktop
- If you get the logon screen the first time you launch the software, that means that there was previously data running on this machine. A demo maybe or a test dataset or this was once used as a windward workstation. Doesn't matter
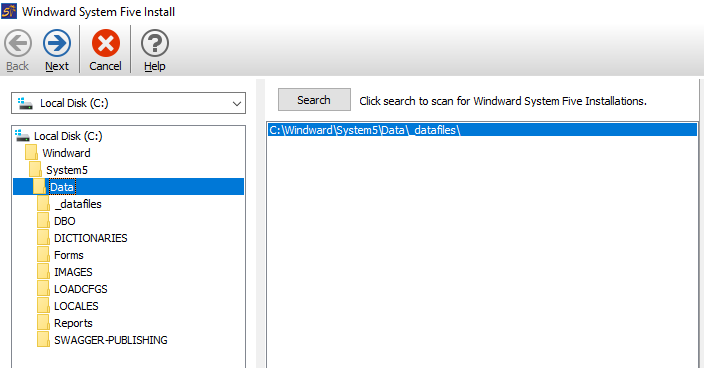
- You should get the windows shown below. Click on the "Link to the existing data" button

- on the left side box, navigate to the location of the Data folder. Notice that the "Search" box on the left automatically located and pointed to C:\Windward\System5\Data\_datafiles. that should be the correct path to your dataset.
- Click on the NEXT button on top to proceed
- This page will ask you to select any available terminal "Not in red" to proceed. Select one and click on the NEXT button again.

- Click NEXT on this page

- Then FINISH

You should be directed back to the login page after this. Do a test login and see if no errors popping up. if you get the error shown below. Follow this WindwardPOS failed to register article.

Workstation Install
The workstation installation is very similar to the server installation. The installers used and steps are similar, except that
- the installers are stored on the server
- We are installing "Client only" of PSQL
- Linking the dataset through the W: mapped drive
You want to create a "Mapped Drive" to the shared Windward folder at the server so you can access Data and installers from the workstations.
- Open File Explorer from the taskbar or the Start menu, or press the Windows logo key + E.
- Select This PC from the left pane. Then, on the Computer tab, select Map network drive.

- In the Drive list, select a drive letter. (you can choose any available driver letter but windward usually selects the W letter.)
- In the Folder box, type the path of the folder or computer, or select Browse to find the folder or computer. To connect every time you sign in to your PC, select Reconnect at sign-in.
Or you can manually type in the \\ServerName\Windward folder shown below

Select Finish.
PSQL Installation
- Go back to the File Explorer > This PC and you should already have a Network Location pointing to the drive letter W:

- Double-click that W: drive to open and navigate to the Temp folder
- Run the Zen-EnterpriseServer installer again but this time install the "CLIENT ONLY"
- The client-only installation will ask whether to install it as an application or as a service. We recommend installing it as a service and click NEXT until FINISH.

System Five Installation
- The same steps outlined in the server-side installation. Just run the installer via the Mapped Drive
Link to the Dataset
- The dataset is stored at the server and not at the workstations and since we already have created a mapped drive to the shared Windward folder at the server. We can link or access the Data through there.
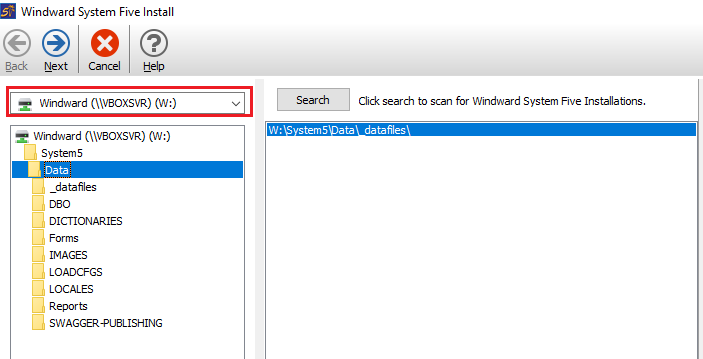
- The same steps outlined above including the registry permission, except when you search for the data. You should select the Drive Letter W:\ instead of Drive C:\
Contact your IT if you cannot make changes in Registry Editor and you do not have Admin access.
Overwriting the Training data with a copy of the Live data
In the past, we have suggested the use of the COPYOVER.BAT file that is found on the public FTP site. This process worked very well prior to the development of our cloud and external integrations. However, now that we have many clients using our cloud and external integrations, which will break if the COPYOVER.BAT file is used. The Development team is aware that an automated option is required, and a new method will be provided as soon as possible. This document will be updated when that new method is made available.
Copying the entire Live Share and Data folders has the potential to break many aspects of both the training and live environments.
For clients that are not using any external integrations, copying the contents of the _datafiles folder from Live to Training would be fine in most cases, but there is still the issue of the custom reports and XML configurations that need to be considered. The Share folder contains numerous configuration files for both the Reports and the XML systems within the application. Simply copying these files from one folder to the other is not always the best approach. Best Practice, if there is any question or doubt, do not copy the live data over the training data.
Upgrading and temporary backups
First important point: There is a major difference between an Upgrade and a Patch.
Updated = A newly released version that contains database structure changes and new data version. These are usually accompanied by a new suite of features and always have a change in the version numbering structure. Example: If a client is currently running version 6.1.2.x (The last digit in not important) and they are being upgraded to version 6.2.2.x or 6.2.4.x, then that constitutes a major upgrade in which a Data Conversion will be required.
Patch = A new build of an existing version that does not contain any changes to the data structure and does not require any data conversions. Example: A client is running 6.2.4.21 and they are being patched with an incremental build of 6.2.4.259. As you can see the first 3 digits of the version number have not changed, only the last digit has changed. That is the easiest way to differentiate between an Upgrade and a Patch.
Installing an Upgrade
The upgrade installer or the FTP Update option can both be used to perform an Upgrade, clients that are comfortable with the process can self-serve, clients that are NOT can request our Customer Care Team’s assistance. In either case, the process of installing the upgrade is the same.
It is always the best practice to create a backup copy of both the data and bin folders prior to upgrading a client’s system to a new released version.
The data and/or trainingdata folder(s) can be copied in place and likewise the bin and/or trainingbin folder(s) assuming an Upgrade of both, the result would look like this on the Server.

Each of the source folders has been copied and they appear as the original folder name with “ – Copy” added to the end. This is clear and understandable to anyone viewing the folder.
Once these copies have been created, the installation of the Upgrade can proceed. The installer will update the original folders, bin, and/or trainingbin, based on the selection made in the installer.
Once the installation of the new version is complete, the application, either trainingbin\systemfive.exe or bin\systemfive.exe can be run using the existing desktop shortcut. The system will initiate the Data Conversion as required and that must complete prior to any other client machines logging in.
If something goes wrong and the data conversion fails, then the easiest thing to do to recover is to delete the bin and/or trainingbin and rename the bin – Copy and/or trainingbin – Copy back to their original names and do the same thing for the Data - Copy and/or Trainingdata – Copy folders.
Typically, if a data conversion fails, there is something wrong with either the structure or contents of the existing data. Therefore, with the permission of the client, it is a good practice to make a copy of the data that failed to convert and place it somewhere on the network so our IT Team can retrieve it for further analysis and resolution of the problem. This copy should not be left in the default folder structure, it should be moved out of that folder structure so that it does not interfere with or add to the client’s backups. A good practice would be to move the copy to the “C:\Windward\ “ folder. This will be easy for our IT team to find and it will be outside the folder structure that the software needs to operate.
If everything goes according to plan and the data conversion is successful, copies of the data are no longer required. They can be moved to a different location for archival purposes or deleted.
NOTE: Once the new version processes a single transaction, the copy of the data is no longer valid and therefore of little use. Some clients may want to keep the copy in case they find a problem in the new version, this is their choice, but that copy should not remain in the default folder structure and it needs to be made very clear, that rolling back to a previous version will cause data lose and require data re-entry. This the main reason why we always recommend that our clients try out the new version in their training environment prior to upgrading their live environments.
Applying Patches
As with the Upgrades, the installer or the FTP Update option can be used to apply the patch. The FTP Update option is the best for self-service as it creates a backup of the existing bin automatically as it is applied. We encourage our clients to use this feature as much as possible.
Patches to an existing version require far less effort and eliminate the need to create data backups as the data structures are unchanged. A copy of the bin folder can be made, but it is not required. We retain an archive of the previous builds, so rolling back can be done should the need arise.
The process of applying the patch can be the same as an Upgrade, the Installer can be run on the client machine to apply the new build of the current version of the software. The installer will replace the applications but should not overwrite any settings or configuration files.
Lock (dataset or terminal)
This sample is taken from a workstation and not from the server
Lock your System Five Terminal
System five terminals are numbered from 1-depends on how many user licenses you have. You can see which terminal number you have via the login screen and under the terminal selection.
This is helpful, particularly in front tills where terminals are set up as such. You don't want the users to switch terminals because there are terminal-specific settings involved.
- Right-click on the System Five shortcut on your desktop and select Properties
- Under Shortcut tab > Target field.
- Point the cursor at the very end of the line
- add 1 space after "SystemFive.exe"
- then type in /forcemachine = System Five terminal number
- click APPLY and OK button to complete
- Your terminal selection should be grayed out now.

Lock System Five shortcut to the dataset
This is helpful to those who have multiple datasets and you want users to access only 1 dataset and not be able to toggle between them. This can also be used to prevent users from entering live transactions into the training data.
- Right-click on the System Five shortcut on your desktop and select Properties
- Under Shortcut tab,> Start in field.
- Delete everything that is already in there and type in W:\System5\Data
- click APPLY and OK but finish

Installing System Five License Codes
The FTP automatic updater is currently not up-to-date and is being worked on. The only way you can do this yourself is to get or ask for the license codes from Windward. Once you have this file, you can follow this instruction Manual Method
Troubleshooting
Version unsupported error when logging in
If you upgraded your operating system from Windows 10 Home to Windows 10 Pro, there are instances wherein the program might still detect the old OS.
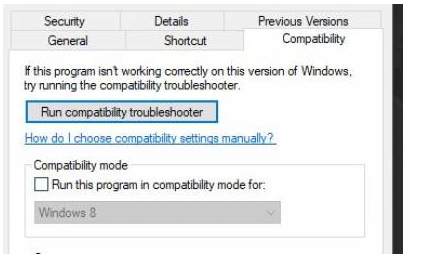
- Double-check the compatibility of the shortcut
- Right-click on the shortcut
- Select Properties
- Select the Compatibility tab
- Make sure that the Run this program in compatibility mode for is disabled
By default, the installer will extract the installation files to "C:\Users\YourUser\AppData\Local\Temp". You may click on the "Browse" button to select a different directory or keep it as is.
- Click on the "Unzip" button to continue
- Once done unzipping, click on the "OK" button to continue
- This is an "all-in-one" installer so you should see more packages or options here. But we are only focusing on the first 2 options from the top as we have not tested the rest of them with our software.
- Click on the "Install Zen v14 Enterprise Server" button because we are installing it on the server machine.
- "Install Zen v14 Client only" is installed at the workstations. Which we will cover later on.
- Click on the "Next" button
- Select "Accept the terms in the license agreement" and click on "Next" to proceed
- Keep the setup type to Complete and click "Next"
- Now, click on the "Install" button and wait for it to finish
- Click "Finish". This should also, open the registry message on your browser. You can close that, we will register or apply the license key in the next steps.
- Now, you can click on the "Exit" button from the package installer window.
Apply the PSQL License Key
We don't normally store or save a copy of the license key on any of your computers. But we can provide it given that there is consent from the Company Owner. So, this process is usually done by the Windward Technician but if you do have the key you can apply it through the steps provided in the article below.
The article states that it is for a User Increase, but the same steps apply to applying the permanent PSQL key.
SystemFive install
- Go back to the Temp folder and look for the "SystemFiveSetup.exe" and run it as an administrator.
- Older System Five installers are called "S5Install.exe"
- The first prompt is going to check for system requirement, Click "Next" when ready
- You will be prompted to create both LIVE and TRAINING installations. You can leave both checked or uncheck training if not needed and click "NEXT".
- By default, the installer will point to C:\Windward\System5 folder. if this is not the case, click on the "browse" button and nagivate to DriveOfYourChoosing\Windward\System5 folder and click on "NEXT" to proceed.
- Click on the "INSTALL" button to begin the installation.
- Now, click on the "FINISH" button to complete. This will also create a shortcut icon on your desktop
Create a Dataset
This part of the process can only be done by a Windward Technician. Because of the data template that we have available for various market retail type, we use specific ones with basic settings already in place to speed the implementation process. You can ask assistance from Support on this.
But if you already have an existing Data, just make sure you have it inside a shared folder, no spaces and with full permission to everyone. In stardardized practice, Windward Support will put it inside DriveOfYourChoosing\Windward\System5 at the server.
Link to the Dataset
After the PSQL and SystemFive installation, there is a need for us to point the software where the dataset is residing. In most cases, the path will not be written into the Windows Registry due to restrictions. And because of this, we will have to set the permission to this entry with Full Read/Write permissions to everyone first.
- Run or search "regedit" via windows, this will open the Windows Registry Editor
- Navigate to Computer\HKEY_LOCAL_MACHINE\SOFTWARE\WOW6432Node\Windward
- Right-click on "Windward" and select "Permissions"
- Click on the "ADD" button
- Under the box for "Enter the object names to select", type in the word "Everyone" and click OK button
- You should be back to the previous screen. Select Everyone and check "Allow" for Full Control. Click APPLY and OK to save
You can close the registry window now.
- Now Run the System Five shortcut on your desktop
- If you get the logon screen the first time you launch the software, that means that there was previously data running on this machine. A demo maybe or a test dataset or this was once used as a windward workstation. Doesn't matter
- You should get the windows shown below. Click on the "Link to the existing data" button
- on the left side box, navigate to the location of the Data folder. Notice that the "Search" box on the left automatically located and pointed to C:\Windward\System5\Data\_datafiles. that should be the correct path to your dataset.
- Click on the NEXT button on top to proceed
- This page will ask you to select any available terminal "Not in red" to proceed. Select one and click on the NEXT button again.
- Click NEXT on this page
- Then FINISH
You should be directed back to the login page after this. Do a test login and see if no errors popping up. if you get the error shown below. Follow this WindwardPOS failed to register article.
Workstation Install
The workstation installation is very similar to the server installation. The installers used and steps are similar, except that
- the installers are stored on the server
- We are installing "Client only" of PSQL
- Linking the dataset through the W: mapped drive
You want to create a "Mapped Drive" to the shared Windward folder at the server so you can access Data and installers from the workstations.
- Open File Explorer from the taskbar or the Start menu, or press the Windows logo key + E.
- Select This PC from the left pane. Then, on the Computer tab, select Map network drive.
- In the Drive list, select a drive letter. (you can choose any available driver letter but windward usually selects the W letter.)
- In the Folder box, type the path of the folder or computer, or select Browse to find the folder or computer. To connect every time you sign in to your PC, select Reconnect at sign-in.
Or you can manually type in the \\ServerName\Windward folder shown below
Select Finish.
PSQL Installation
- Go back to the File Explorer > This PC and you should already have a Network Location pointing to the drive letter W:
- Double-click that W: drive to open and navigate to the Temp folder
- Run the Zen-EnterpriseServer installer again but this time install the "CLIENT ONLY"
- The client-only installation will ask whether to install it as an application or as a service. We recommend installing it as a service and click NEXT until FINISH.
System Five Installation
- The same steps outlined in the server-side installation. Just run the installer via the Mapped Drive
Link to the Dataset
- The dataset is stored at the server and not at the workstations and since we already have created a mapped drive to the shared Windward folder at the server. We can link or access the Data through there.
- The same steps outlined above including the registry permission, except when you search for the data. You should select the Drive Letter W:\ instead of Drive C:\
Contact your IT if you cannot make changes in Registry Editor and you do not have Admin access.
Overwriting the Training data with a copy of the Live data
In the past, we have suggested the use of the COPYOVER.BAT file that is found on the public FTP site. This process worked very well prior to the development of our cloud and external integrations. However, now that we have many clients using our cloud and external integrations, which will break if the COPYOVER.BAT file is used. The Development team is aware that an automated option is required, and a new method will be provided as soon as possible. This document will be updated when that new method is made available.
Copying the entire Live Share and Data folders has the potential to break many aspects of both the training and live environments.
For clients that are not using any external integrations, copying the contents of the _datafiles folder from Live to Training would be fine in most cases, but there is still the issue of the custom reports and XML configurations that need to be considered. The Share folder contains numerous configuration files for both the Reports and the XML systems within the application. Simply copying these files from one folder to the other is not always the best approach. Best Practice, if there is any question or doubt, do not copy the live data over the training data.
Upgrading and temporary backups
First important point: There is a major difference between an Upgrade and a Patch.
Updated = A newly released version that contains database structure changes and new data version. These are usually accompanied by a new suite of features and always have a change in the version numbering structure. Example: If a client is currently running version 6.1.2.x (The last digit in not important) and they are being upgraded to version 6.2.2.x or 6.2.4.x, then that constitutes a major upgrade in which a Data Conversion will be required.
Patch = A new build of an existing version that does not contain any changes to the data structure and does not require any data conversions. Example: A client is running 6.2.4.21 and they are being patched with an incremental build of 6.2.4.259. As you can see the first 3 digits of the version number have not changed, only the last digit has changed. That is the easiest way to differentiate between an Upgrade and a Patch.
Installing an Upgrade
The upgrade installer or the FTP Update option can both be used to perform an Upgrade, clients that are comfortable with the process can self-serve, clients that are NOT can request our Customer Care Team’s assistance. In either case, the process of installing the upgrade is the same.
It is always the best practice to create a backup copy of both the data and bin folders prior to upgrading a client’s system to a new released version.
The data and/or trainingdata folder(s) can be copied in place and likewise the bin and/or trainingbin folder(s) assuming an Upgrade of both, the result would look like this on the Server.
Each of the source folders has been copied and they appear as the original folder name with “ – Copy” added to the end. This is clear and understandable to anyone viewing the folder.
Once these copies have been created, the installation of the Upgrade can proceed. The installer will update the original folders, bin, and/or trainingbin, based on the selection made in the installer.
Once the installation of the new version is complete, the application, either trainingbin\systemfive.exe or bin\systemfive.exe can be run using the existing desktop shortcut. The system will initiate the Data Conversion as required and that must complete prior to any other client machines logging in.
If something goes wrong and the data conversion fails, then the easiest thing to do to recover is to delete the bin and/or trainingbin and rename the bin – Copy and/or trainingbin – Copy back to their original names and do the same thing for the Data - Copy and/or Trainingdata – Copy folders.
Typically, if a data conversion fails, there is something wrong with either the structure or contents of the existing data. Therefore, with the permission of the client, it is a good practice to make a copy of the data that failed to convert and place it somewhere on the network so our IT Team can retrieve it for further analysis and resolution of the problem. This copy should not be left in the default folder structure, it should be moved out of that folder structure so that it does not interfere with or add to the client’s backups. A good practice would be to move the copy to the “C:\Windward\ “ folder. This will be easy for our IT team to find and it will be outside the folder structure that the software needs to operate.
If everything goes according to plan and the data conversion is successful, copies of the data are no longer required. They can be moved to a different location for archival purposes or deleted.
NOTE: Once the new version processes a single transaction, the copy of the data is no longer valid and therefore of little use. Some clients may want to keep the copy in case they find a problem in the new version, this is their choice, but that copy should not remain in the default folder structure and it needs to be made very clear, that rolling back to a previous version will cause data lose and require data re-entry. This the main reason why we always recommend that our clients try out the new version in their training environment prior to upgrading their live environments.
Applying Patches
As with the Upgrades, the installer or the FTP Update option can be used to apply the patch. The FTP Update option is the best for self-service as it creates a backup of the existing bin automatically as it is applied. We encourage our clients to use this feature as much as possible.
Patches to an existing version require far less effort and eliminate the need to create data backups as the data structures are unchanged. A copy of the bin folder can be made, but it is not required. We retain an archive of the previous builds, so rolling back can be done should the need arise.
The process of applying the patch can be the same as an Upgrade, the Installer can be run on the client machine to apply the new build of the current version of the software. The installer will replace the applications but should not overwrite any settings or configuration files.
Lock (dataset or terminal)
This sample is taken from a workstation and not from the server
Lock your System Five Terminal
System five terminals are numbered from 1-depends on how many user licenses you have. You can see which terminal number you have via the login screen and under the terminal selection.
This is helpful, particularly in front tills where terminals are set up as such. You don't want the users to switch terminals because there are terminal-specific settings involved.
- Right-click on the System Five shortcut on your desktop and select Properties
- Under Shortcut tab > Target field.
- Point the cursor at the very end of the line
- add 1 space after "SystemFive.exe"
- then type in /forcemachine = System Five terminal number
- click APPLY and OK button to complete
- Your terminal selection should be grayed out now.
Lock System Five shortcut to the dataset
This is helpful to those who have multiple datasets and you want users to access only 1 dataset and not be able to toggle between them. This can also be used to prevent users from entering live transactions into the training data.
- Right-click on the System Five shortcut on your desktop and select Properties
- Under Shortcut tab,> Start in field.
- Delete everything that is already in there and type in W:\System5\Data
- click APPLY and OK but finish
Installing System Five License Codes
Troubleshooting
Version unsupported error when logging in
If you upgraded your operating system from Windows 10 Home to Windows 10 Pro, there are instances wherein the program might still detect the old OS.


