Overview
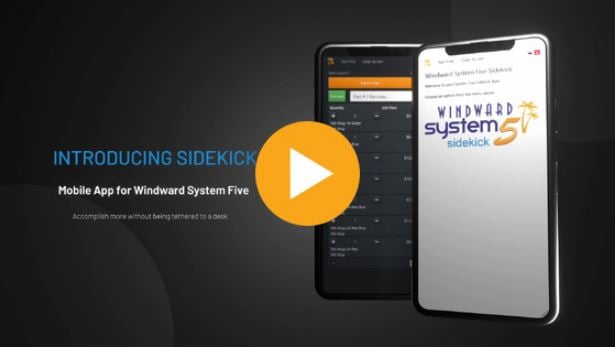
Sidekick and its data collection feature has a help button as pictured below. You must be authenticated to Sidekick with your credentials to access menus and settings. This article details the legends, buttons, Zebra TC-21/22 setup with some additional screenshots.
You can also access this text from the question mark icon when in a data collection from your mobile device.

- Scan Color Legend
- General Info
- Scanner Info
- Zebra TC-21/22 Touch Computer Scanner configuration
- Data Collection Listing Features
- Settings
Scan Color Legend
New Scan - Unsaved (Purple background)
New unverified scan item (Not yet saved to Cloud)
New Scan - Saved (Blue background )
New unverified scan item (Saved to Cloud)
Part Found (Green background)
Part verified, found in Staging
Part Not Found (Orange background)
Part not verified, not found in Staging
Multiple Part Matches Found (Magento background)
Multiple Part matches found in Staging
Error (Red background)
Error with scan item
General Info
- Data Collection requires a full-time internet connection.
- Collected data is stored in the cloud.
- Closing or browsing away from SideKick during cloud activity could result in data loss!

Overall Cloud saving activity is denoted by the rotating green cloud icon. 
Cloud activity for a specific line is denoted by rotating dots.
- Certain functions are disabled while cloud activity is occurring (Submit, Settings, Export, etc.)
- Collected data is only accessible from the SideKick instance that collected it until Submitted.
- SideKick Instance relates to the specific browser instance the SideKick application is being run in.
- i.e. Running simultaneous copies in Edge, Edge (InPrivate), Chrome and Chrome (Incognito mode) on one device would be 4 instances and the data collected would be associated to each browser separately.
- Validation is simply a quality-of-life feature; scan data is still accepted, saved and submitted whether validated or not.
- The only exception would be scanning in the error state; There will be a button showing the error information; some errors could be related to saving in which case that data would not be saved for submission.
Scanner Info
- Barcode scanning logic is implemented for high performance. Scans are captured by the local browser and submitted to the server independently of the follow-up operations to save the scan to the cloud and validate them.
- Barcode scanners supporting HID (keyboard emulation) mode configured with a CR (Enter) suffix should work.
- Refer to your scanner's documentation on how to configure it
- If barcode data is frequently being cut off, or missed, you may need to configure the transfer speed of your scanning device to be slower if the browser on your device can't keep up.
- If scan data is lost only when rapid-fire scanning, you may simply need to be slightly less trigger-happy. ?
Zebra TC-21/22 Touch Computer Scanner configuration
- Open the DataWedge application (located in the zConfigure group on the home screen of the TC-21 or 22.
- Open Profile0 (Default)
- Scroll to the Barcode Input section
- Enabled checked
- Scroll to the Barcode Input section
- Scroll down to Keystroke Output
- Enabled checked
- Open Key Event Options
- Send Characters As Events checked
- Back to the previous menu
- Open Basic Data Formatting
- Enable checked
- Send Data checked
- Send ENTER Key checked
- Back to the previous menu
- Open Profile0 (Default)
- Done - you can close the DataWedge application
Data Collection Listing Features
Click on the top "Data Collection" menu. You will either be prompted with a "Create New Data Collection" button or will resume the collection you have active.

- Item Count - The number of unique scan values in the Data Collection.
- Add Scan Manually- Toggles display of an input box allowing you to type in a scan value manually.
- This box disappears after entry or loss of focus to prevent barcode scanner entry from occurring in the input box; the scanning works, but performance is slower.
- Part Find- Opens the Part Find window allowing you to locate a part manually and add it to the Data Collection. +/- on that window will increment/decrement scan quantity.
- The scan value added in this way is Part Number
- Filter - Toggles display of an input box allowing you to search the scanned values in the listing (press the X icon to clear the filter).
- Clear - Deletes the Data Collection and starts fresh (cannot be undone).
- Sort:- You can choose to sort the listing by Date Created or Date Updated.
- Created - Scans are sorted by when they were created - Sort descending ⬇️ if you want to see the most recently added items shown at the top.
- Updated - Scans are sorted by when they were updated - Sort descending ⬇️ if you want to see the most recently updated items shown at the top.

Increment the scan quantity by 1. 
Decrement the scan quantity by 1. 
For Validated items, you can view the inventory details in a popup window. - Quantity - You can click the quantity displayed to get a popup allowing you to quick select a quantity 1 to 9, delete the scan line, or open a manual entry popup to type in any other quantity.
- Scan Details- Displayed below the +/- and Quantity - shows the Scanned value and if validated, the related inventory description.
- The date displayed will be the Date Created or Updated (in local time) depending on the Sort: selection made.
Settings
Clicking on the gear icon will give you a menu to access Export, Settings and About menu items.

Export will preview the selected scan batch on the screen. You can then choose to print or select other download methods from the tray icon menu. You can also Export other scan batches by selecting from the "Data Collector" and "Export" menu.

Settings will let you select the CSV Export Format which Controls the downloaded export file format. This should be configured to match the System 5 Setup Wizard setting.

About will share internal user ID information about the scan batch and user information. This can be useful if working with support and troubleshooting an issue.


